Mudroom Refresh + 4 Easy DIY Projects
Ready for a mudroom refresh + 4 Easy DIY projects? We are doing this with my favorite items from Better Homes & Gardens line at Walmart!

We have been working on our house, making it a home one room at a time! I am so grateful to partner with Better Homes & Gardens line at Walmart, they have everything to transform your home from paint, wallpaper, and decor!


Here is where we are starting! Today we are going to be doing some fun projects. The first mudroom project is the one that transforms any space for the most inexpensive way! Paint, isn’t the power of paint amazing??
Supplies for Mudroom Painting + Costs
Grey Paint Dolphin Fin Gallon – $45 ( We had on hand)
White Paint Crockery White Gallon – $45 ( We had on hand)
Better Homes & Gardens Paint set – $22
Total : $112.00 if no paint on hand – Our cost : $22


I feel like the thing we have done most in this house already is painting, but its such a great way to transform any space! I wanted to switch up the paint and when I painted the bottom grey, you might be thinking what are you doing? Keep watching!

Next it was time for the white! I always do two coats, even if it says 1 – here you can see its getting there but time to keep painting!


Before we put another coat on the walls, let’s get this doors done! Now that I am writing this I think we are over 4 DIYS – yay for extras! You can always use a brush or roller for doors, but it will always look best sprayed!
* If its going on an exterior door make sure to use exterior paint!

Here is the progress of the painting, from start to finish! But we aren’t done yet! Now let’s start on the next project and get to the fun part of decorating with Better Homes & Gardens items!

Operation closet redo! We have big plans for this space, but for now seeing these shelves have driven me crazy! Since we see this space in the first one I shared lets redo this! First lets take out the shelves – these were NOT fun and left some fun holes!


After filling the holes, and sanding them… its time to spray it!!
Total cost : $0 since we had everything!

Now that the hallway is all painted and done, lets work on these FLOORS! Honestly the paint and everything in the house don’t bug me as much as these floors.. if you saw I might have wanted to paint them but … we found a different temporary solution!

If you have following you know I HATE my floors, yes I said the H word, but we aren’t ready for a big kitchen/butler pantry remodel … so we are doing this temp fix – and on a BUDGET! Its an easy DIY but I can’t tell you how well they will hold up… but the reviews are GOOD! Peel & Stick tile … here we come!
Floor Redo:
Flooring $35 a box for the butlers pantry, and mudroom Total cost – $87.50


I will be going into more detail as we work on the rest of the floors, but I just love how this is looking!

Hooks & Drawer Pulls :
Hook $6.64 x 4 = $26.58
Drawer Pull = $10.23
These are so nice as is – but I wanted to make it more me… so spray paint it was and we had it on hand!
TOTAL COST : $36.79


Another way to not only make a space functional, but cute is drawer pulls and hooks! Our last mudroom I will say I miss – so we are making this one more like home. I love these hooks from the Better Homes & Gardens line!

When you are painting them, don’t forget the screws too!


Yes these are “faux” drawer pulls but they sure make the space right??


Here are the hooks, honestly this is just to show the space while the kids were at school with their backpacks so that is what normally will go on the hooks – remember I said functional!

DIY Peg Boot Rack :
Wood Piece 1X6-6FT SELECT PINE BOARD $15.84
Wood Dowel 1″X48″ $5.18 x2 = $10.36
1″ drill bit – $11.97
Wood Glue – had on hand
Saw – had on hand
Drill- had on hand
Screws- had on hand
Total = $38.17


First we had to test on how far apart we wanted, its all on preference!

Then you will measure where you want the pegs to go!

You would think now that we have not one, but 7 garages that James would work in them… but its outside and in the kitchen for this 😛
Time to cut the wood, for this just cut to what size you want for your space!
Now its time to measure all the spots for the peg and mark the spots!


Then naturally in the kitchen its time to cut all the holes out! Put some wood glue in and insert into the holes – I will do a more in depth post soon! Sand the edges and put it together!


Let’s install these boot racks! There honestly is so many ways you can make them – paint or stain them but this is what I love!
We are all done with the DIYS lets decorate with my fun finds from Better Homes & Gardens line at Walmart!

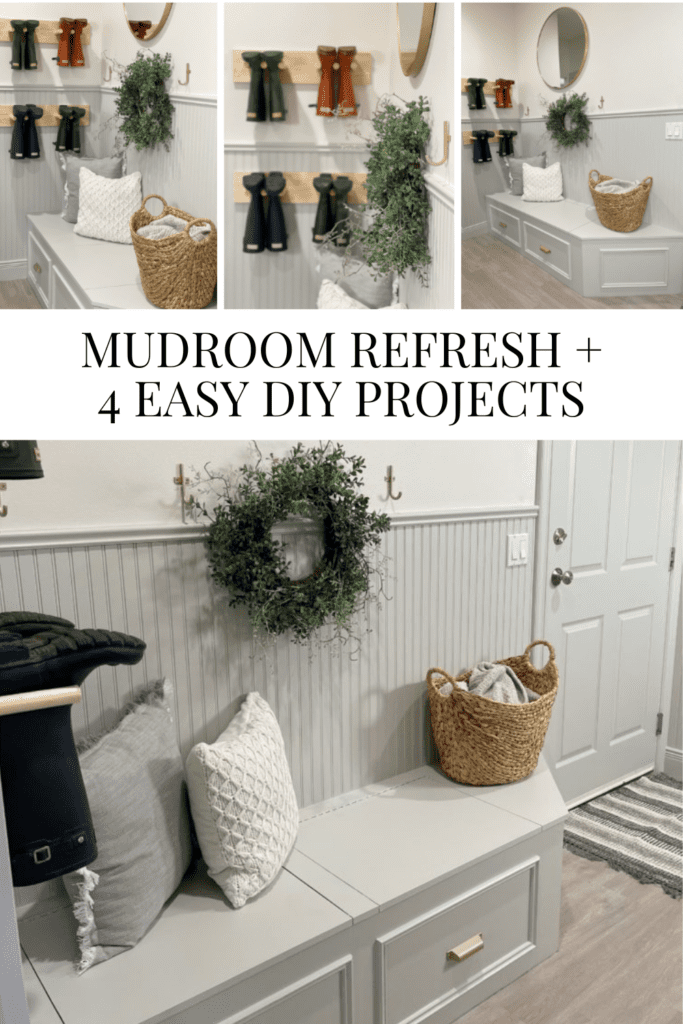
Here is the fun little before and after of the Mudroom! I am so happy with it!

Here is the other sides before and after – can you even!! What is your favorite part? I love the mirror HERE and that it finished the whole space!
I love every single view of this room! Look at those drawer pulls!!

This little boot rack is just so special to me! I love that the kids have a spot to put their boots! Ps – did you notice this Better Homes & Gardens basket?? I love it and now need to fill it with the kids things that we can’t forget and they can grab!

I hope you have loved seeing step by step how we transformed this space and that we are making our house one room at a time! A special thank you to Better Homes & Gardens for sponsoring this post and making it possible to do what I love and create! You can shop all the items below and through this post <3
Like this post? Save it on Pinterest. Follow me on Pinterest.