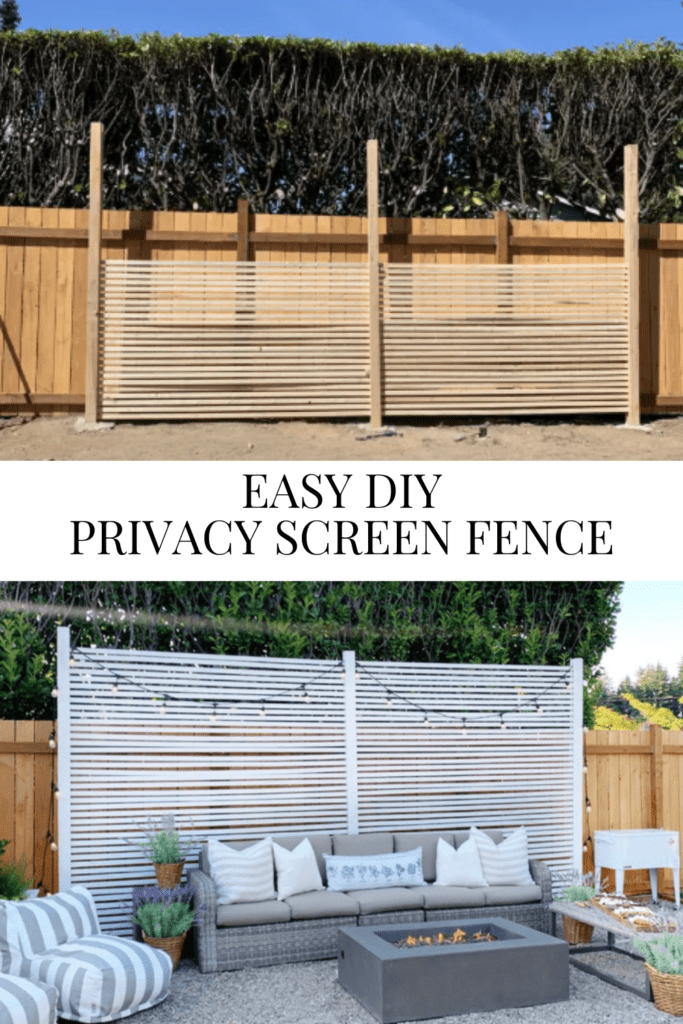
Easy DIY Privacy Screen / Fence
How to build an easy DIY Privacy Screen / Fence, yes I said EASY! It was so easy I did it myself, let me show you how to! Make sure to watch the video too!

Here you see the final product, now do you want to see the process? Its amazing what you can do to a space.

Here is the before, this was just before we prepped the area for this space. I will make sure to update with a post on that progress soon!

First it was time to get supplies!
SUPPLIES YOU WILL NEED:
84 – 1x2x8
6 – 2x4x12
4 – bags of cement
Brad Nails
Brad Nailer
Outdoor Paint
Paint Sprayer
*Piece of wood cut for a spacer
Now for the amount of supplies – this is what we needed for our space, so measure accordingly for your height and width of yours.

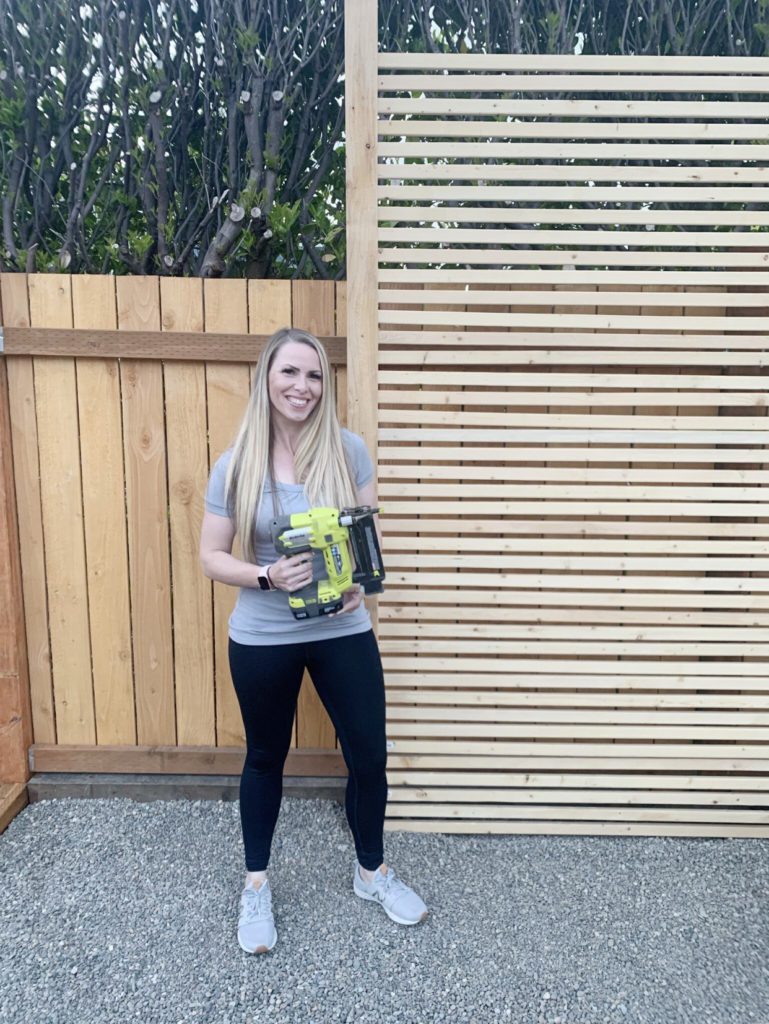
Here is the start of the project, I will have to say I was out and James started this without me. We both see things differently, and I would have done it another way. James wanted this to be super secure – which it is. Doing it this way I just was sliding in the 1×2’s and using a spacer which was easy… but I would have rather just had one 2×4 in the cement, then nailed the boards on and added the additional 2×4 in the end if that makes sense? I will show you how this went and stay tuned for another project like this!

Now lets get started! First make sure they are level and then it will be easy to go afterwards. We cut one of the 1×2’s and used it as a spacer. If you continue to read on you can see the whole video of the process and it shows how easy it is.

I do have to say, once you get going on this it really goes so quickly!

I really love the color of these boards, but we are going to paint them! Now are you ready to see the whole process on video?
Now that you saw the video, are you ready to make your own?
I am so proud of this project, it was one I did on my own and knowing I did this I can do anything and you can too!

Are you ready to see me paint this??

Since this was so close to the fence, I made sure to put a plastic sheet behind the privacy screen so I can use a paint sprayer.

I love this paint sprayer from Home Right TPS you can find it HERE.

As much as I loved the natural I love how the white just pops!

I am getting there – almost done!


Here it is all complete, now its time to decorate this space!
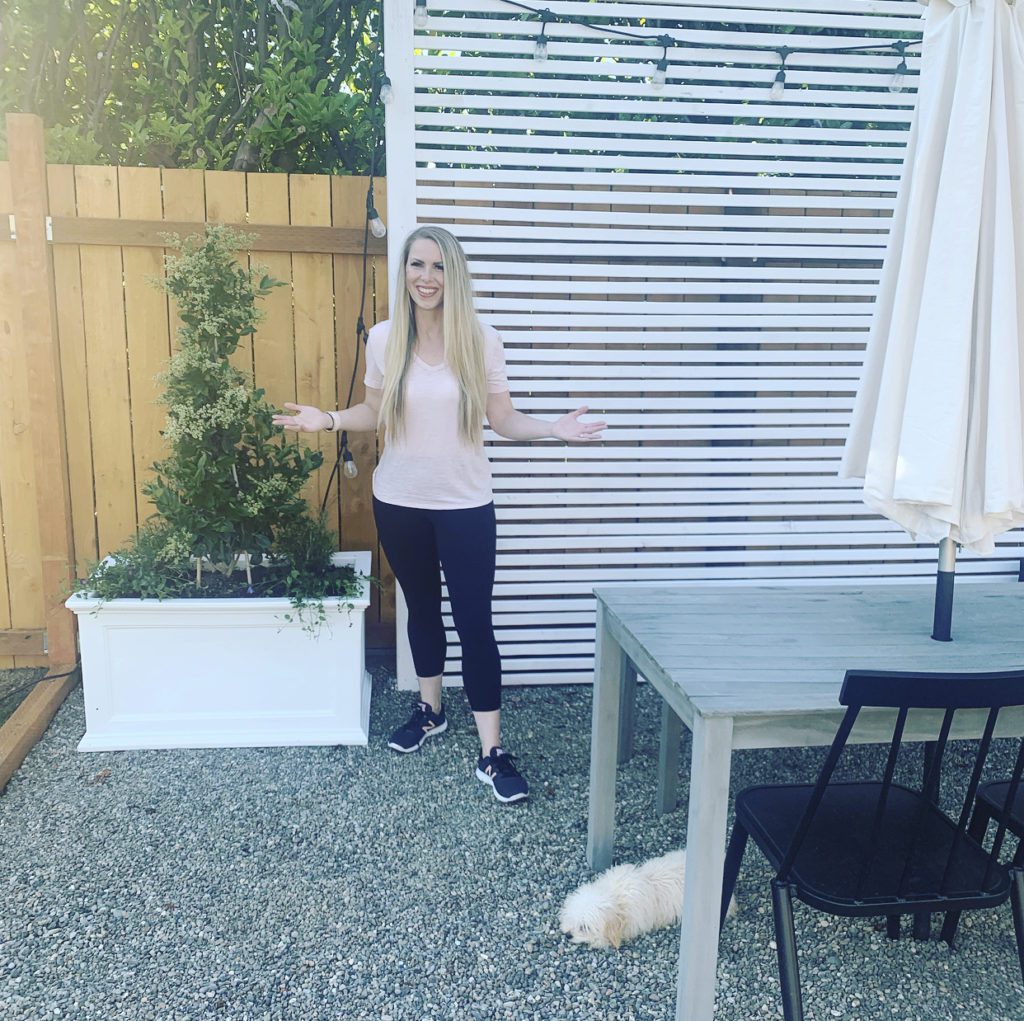
I hope you enjoyed how I did this easy DIY Privacy Screen / Fence and make sure to tag me, or share with me your finished project! I love that you can do this big or small! Stay tuned for more projects like this!
TO SHOP ITEMS FROM THIS PROJECT JUST CLICK THE PHOTOS BELOW:
Like this post? Save it on Pinterest. Follow me on Pinterest.


Love it !! You done a wonderful job. I hope to do this around our fire pit area. Your feed is always so inspiring.
What kind of wood are the boards? Did u spray a sealant over the paint? Did you get them at home depot? So the frame is 2 boards in the cement and u slide the boards between the 2 pecies of wood correct? Thanks for sharing i absolutely love your home and ideas 🥰