Easy DIY A – Frame Tent
Need a last minute quick A frame tent? Today we will show you a quick and easy non- permanent one!

I had this grand idea how I wanted Zoe’s quarantine birthday to go, but with stores out of reach and everything had to be online, what we had at home, or could borrow – it was time to be creative! My idea was to use our camper and to turn it pretty with a flowy tent attached, but our space next to it was limited .. so I nixed that idea. Then the morning of her birthday we got the balloons ready, and were planning where to hang the sign I realized that our house was to far from the road for her drive by! I remembered we had wood for her bed and quickly we decided to make an A frame tent! Just remember this was on a whim, and we didn’t look up anyway to do it. Now to show you how we made it!
WHAT YOU NEED FOR AN A FRAME TENT :
- 2 x 2 x 8 Furring Strip Board Lumber {We used 5}
- Screws
- Fabric / Sheet / Curtain {whatever you have on hand}
- Drill
- Stapler
- String / Twine / Ribbon {whatever you have on hand}

Are you ready for this EASY DIY?
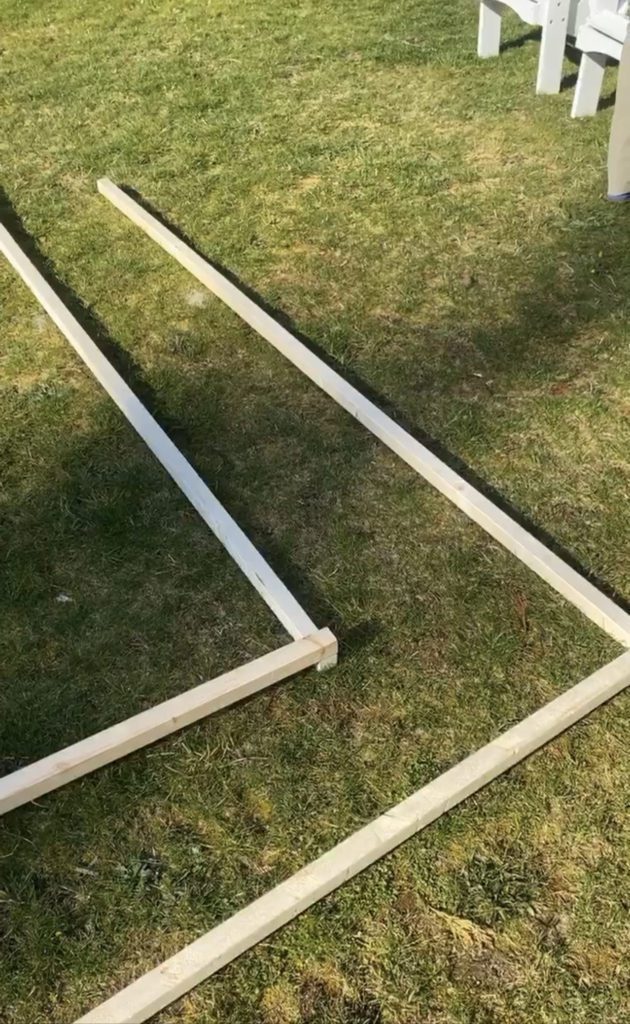
- Just take two of the 2x2x8’s and attach them with a screw. Next you will do that to two more. If you need it to be a smaller A – frame tent make sure to cut accordingly.
2. Now that you have the two sides done, its time to connect the middle piece.
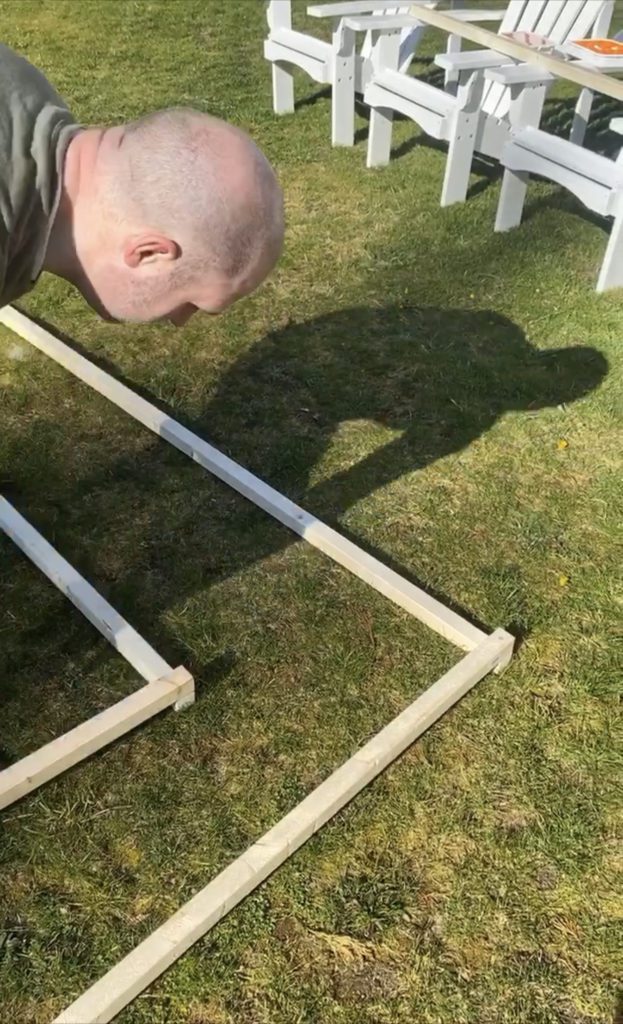
3. Take one side, and attach to a 2x2x8.
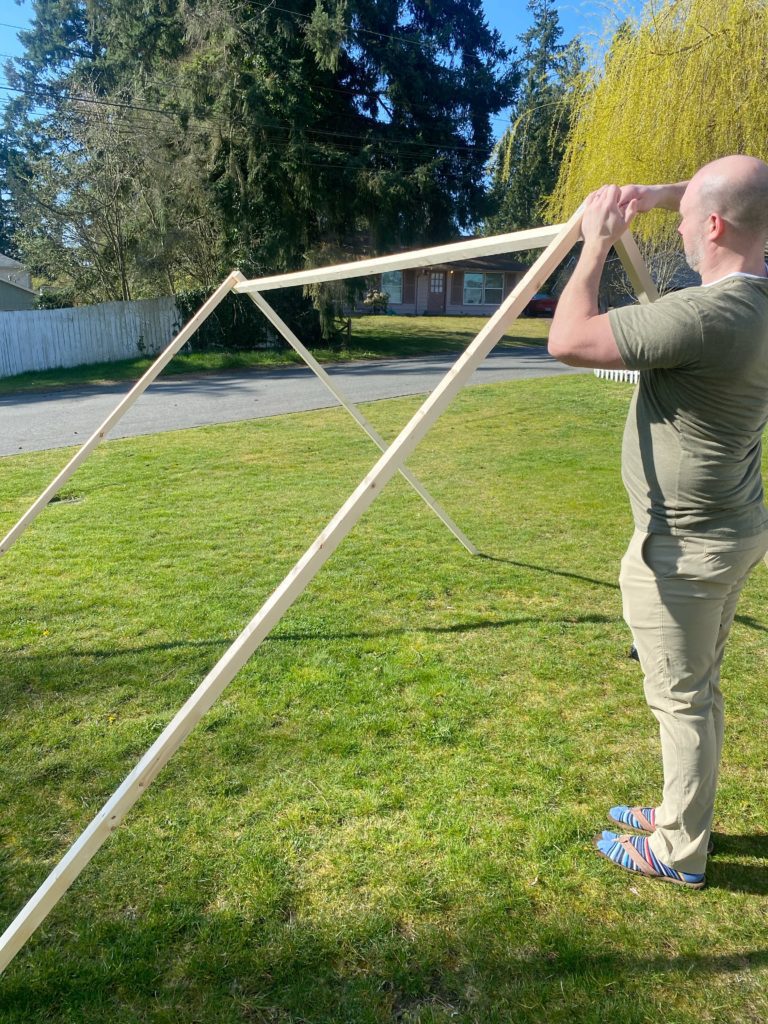
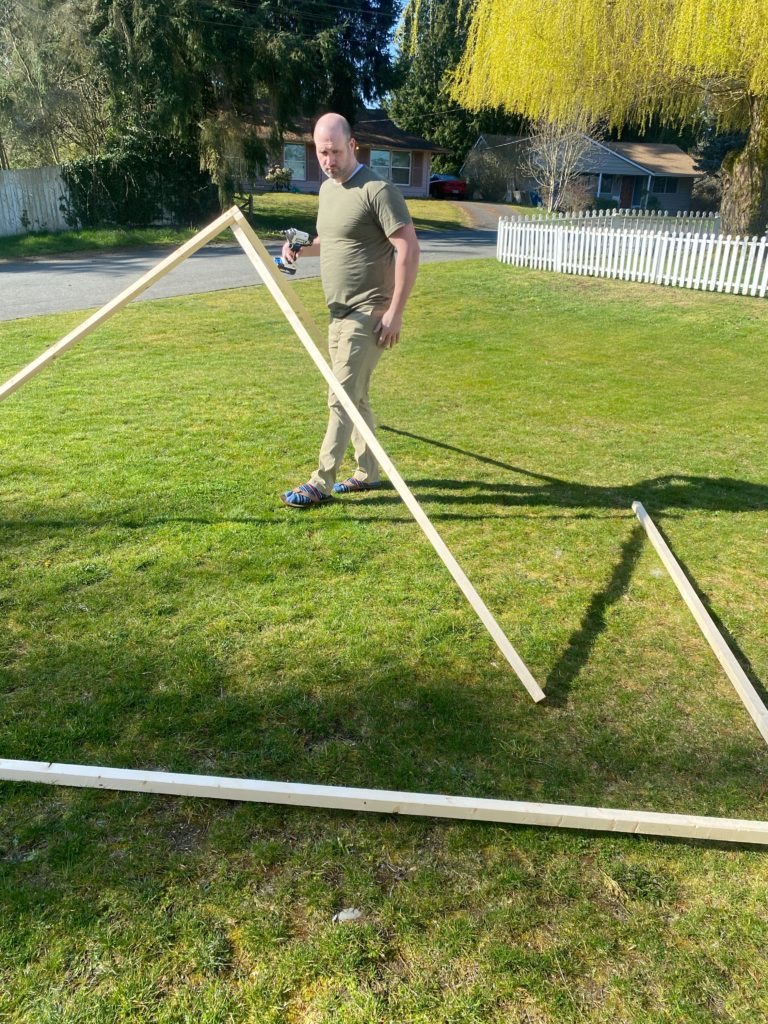
4. Now you will attach the finished pieces to the first side piece. Then you have your A – frame!

5. For this part you can do it however it fits your look best. We had fabric and we attached it to the lumbar with a stapler. We loved the open look for this situation, but it would be fun to attach two more 2x2x8’s on the bottom to hold the fabric down. The options are endless!

Here is the completed A – frame! It was a hit, and Zoe was so surprised! It literally took under 5 minutes to make. The longest part was me trying to explain my vision to James. Maybe I shouldn’t ask for a tpee haha! Tpee – A frame same thing right…..
If you missed Zoe’s Unicorn Birthday party check it out HERE.
Need a Unicorn Birthday Cake? Check out my EASY tutorial HERE.
Easy DIY A – Frame Tent

Need a last minute quick A frame tent? Today we will show you a quick and easy non- permanent one!
Materials
- 2 x 2 x 8 Furring Strip Board Lumber {We used 5}
- Screws
- Fabric / Sheet / Curtain {whatever you have on hand}
- String / Twine / Ribbon {whatever you have on hand}
Tools
- Drill
- Stapler
Instructions
- Just take two of the 2x2x8’s and attach them with a screw. Next you will do that to two more. If you need it to be a smaller A – frame tent make sure to cut accordingly.
- Now that you have the two sides done, its time to connect the middle piece.
- . Take one side, and attach to a 2x2x8.
- Now you will attach the finished pieces to the first side piece. Then you have your A – frame!
- For this part you can do it however it fits your look best. We had fabric and we attached it to the lumbar with a stapler. We loved the open look for this situation, but it would be fun to attach two more 2x2x8’s on the bottom to hold the fabric down. The options are endless!
PIN THIS IMAGE FOR LATER, AND COME PIN ALONG WITH ME HERE.

DON’T MISS THESE POSTS :
- Home Theater Room Reveal
- Space Themed Teen Bedroom Makeover
- Call Ducks
- Garage Makeover
- Mother’s Day Tradition


